Tealium
Tealium
The Tealium Customer Data Hub collects, unifies, enriches, and empowers you to take action on your most valuable asset: customer data.
Integration: Customer Recognition
Setting up FullContact Customer Recognition tag in TealiumiQ
The FullContact Customer Recognition tag will attempt to resolve anonymous visitors in real-time, down to an anonymous personID and store it in a cookie or localStorage. This guide will walk you through how to generate a customer recognition tag within the TealiumiQ platform.
Adding the Tag
To set up the Customer Recognition tag in TealiumiQ, first login into your Tealium account. From the Tealium Dashboard, navigate to the Tags section and select "Add Tags". Search for Tealium Custom Container template, and click "+Add":


Configuring the Tag
Once the tag has been added, you can copy and paste some Javascript that we have prepared for you into this container.
Open the following recipe to grab a copy of that Javascript.
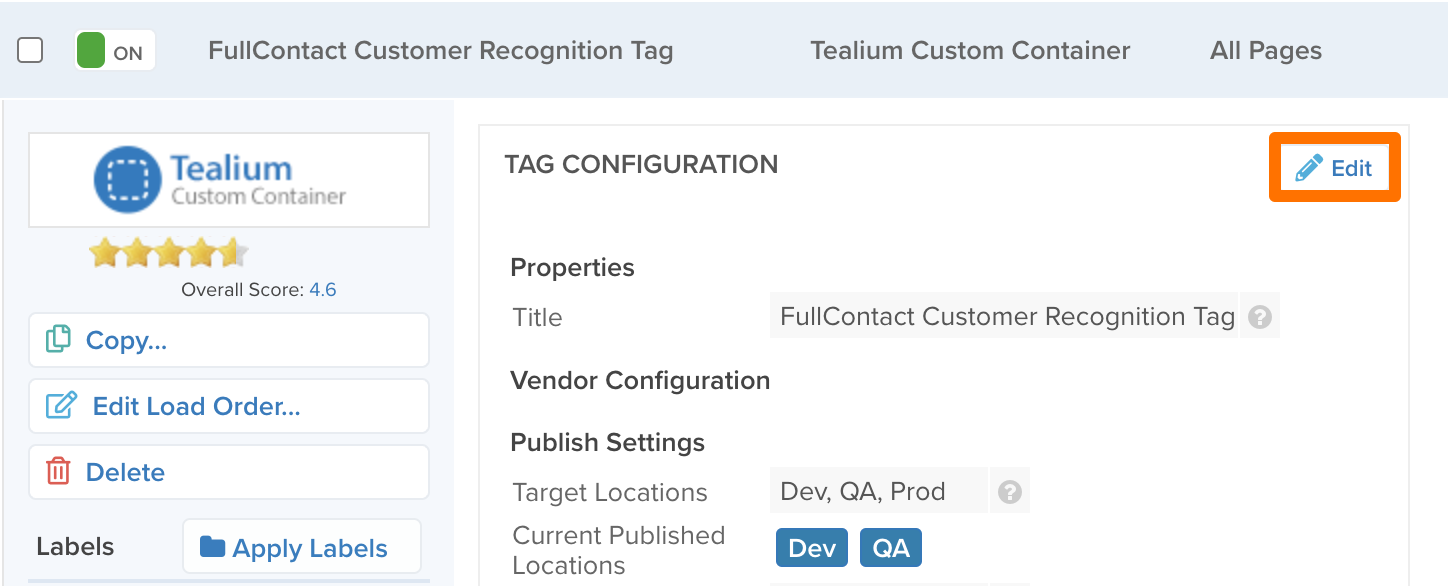
Next, click on the name of the tag to expand the settings. (See the following screenshot)
Under the Tag Configuration section, choose "Edit":

A modal will open and scroll down to the "Advanced Settings". Expand the advanced settings and change the Tag Timing to "Prioritized". Also, scroll down to and click on the "Edit Template" button. Remove all of the code within the template editor and paste the Javascript we copied in the previous step. Once pasted, click "Apply" in the bottom right corner and close the template’s window.
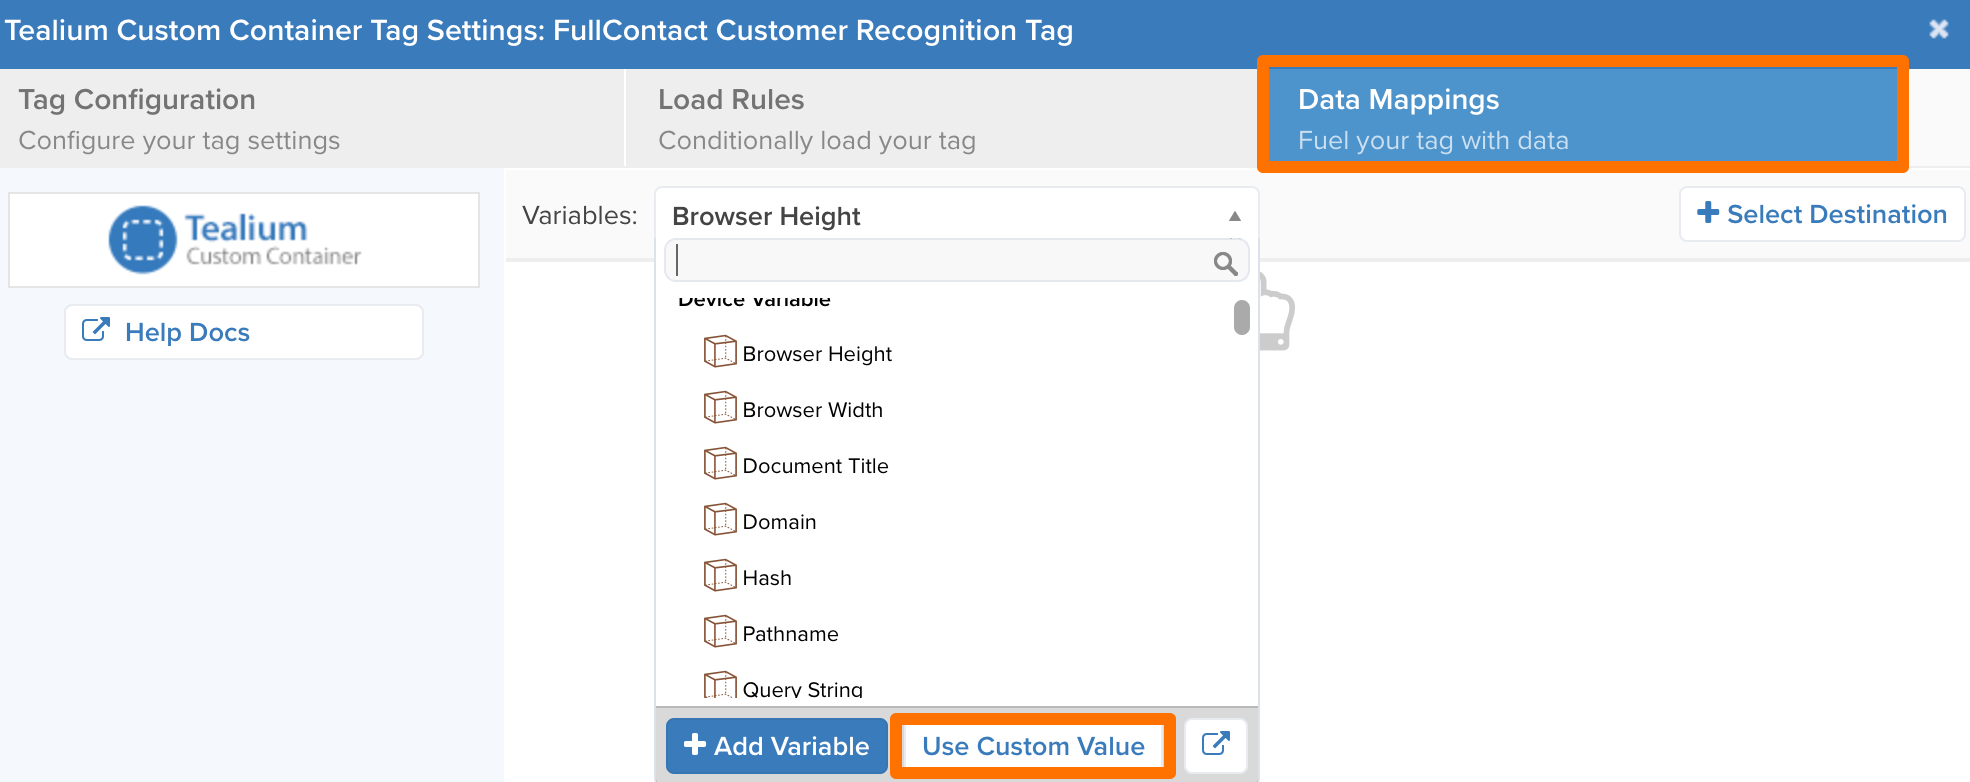
After updating the template, click on the "Data Mappings" section. Expand the "Variables" dropdown and click "Use Custom Value".

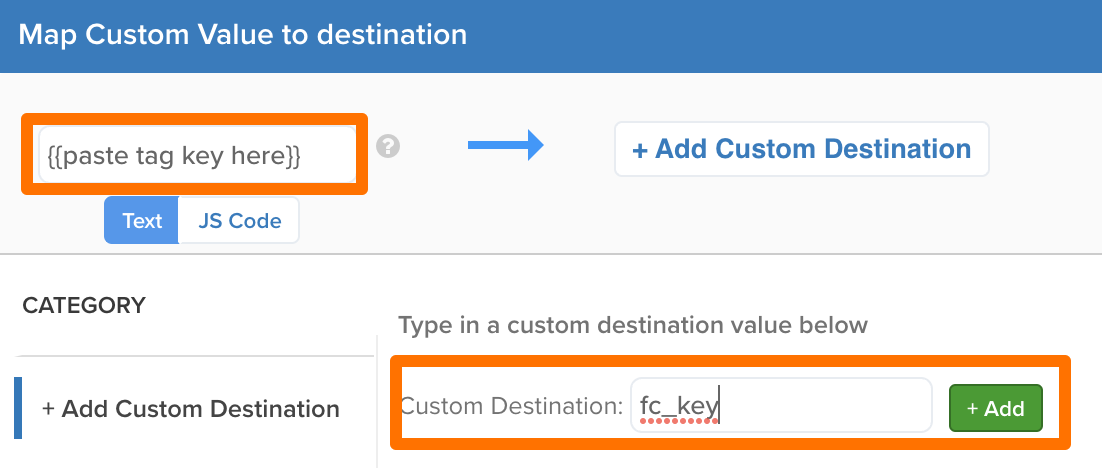
Add the FullContact Tag Key as Text and type in "fc_key" in the custom destination field. Once added the setup will be complete!
Note: If you don’t yet have your FullContact key, please visit the Set Up Customer Recognition Tag documentation to understand how to get that key.

Related Links
Updated 8 months ago